Showing posts with label In The Kitchen. Show all posts

8.06.2011

E Mealz

Today's post is a public service announcement.  It applies to you if you:
  • have mouths to feed
  • are on a budget
  • like to cook but get tired of figuring out what to cook each week
  • don't like to cook but know you should because it's cheaper & healthier

I want to tell you about E-Mealz.  I believe it is quite possibly the best thing since sliced bread.

The E-Mealz slogan is "easy dinner menus for busy and frugal people".  Basically, when you sign up, and it's cheap (like $5 a month per meal plan), you get access to a weekly menu.  You choose which meal plan(s) you want to sign up for.  There are things like low carb, low fat, vegetarian, etc.  You also select the grocery store where you normally shop.  Here is the amazing thing:  each week when your menu is published, it will be customized based on what dietary restrictions you choose (for example, I'm doing the portion control plan, aka the weight watchers plan, because I'm trying to drop this baby weight) AND it will incorporate the sales at your grocery store.

I literally used to ride by Publix, pick up the ad, look thru and see what was on sale, then pull out my cookbooks and spend hours looking thru them to see what I could cook that would use the meat that was on sale.  I know, I know.  Kind of crazy.  (Not as crazy as spending hours clipping coupons and then buying 100 deoderants just because they're on sale and I have 100 coupons.  I'm just sayin'.)  I truly began to despise making my grocery list.  E-Mealz has changed that.  Oh yeah - not only do you get a menu but it comes with a shopping list that includes everything you need for 7 meals, and it's always less than $100 for the whole list.  AMAZING, right?

Okay - so the one little caveat is that we've been doing this for maybe 4 weeks, and some of the meals haven't been the tastiest, so I was kind of holding off on this post, because I wasn't sure I wanted to rant and rave about it if the meals weren't yummy.  All that has changed in the last week or two.  They aren't all five star dinners (keep in mind we're doing a diet menu), but we've had some very tasty meals.  Plenty of things I'd serve to a guest (which is how I judge whether something is good) and several recipes I will continue to make again and again.  This week I made a meatloaf for the first time ever, and it was awesome.  Oh, and it was in the crock pot.  How's that for a time saver?

So, to make a long story even longer, I highly recommend E-Mealz if you would like to save time and money and cook for your family on a  more regular basis.  If you are picky and already thinking that you probably won't like a lot of the meals, it's really still worth the $5 a month.  I'm picky.  I just look thru and choose the ones I like, and if there aren't enough for one week, I'll go back to the old menus and choose others that I know are good.

E-Mealz is a time saver.  A money saver.  And for our family right now, a life saver.  Go check it out!

4.27.2011

Baked Alaska


As I mentioned in my last post, we had a family get together at my Uncle Stephen's house on Saturday.  The original intention for the gathering was to have a belated birthday celebration for my grandfather, whose birthday was April 17th.  Since I love to do dessert, I offered to be in charge of the dessert for the lunch, and I figured I'd ask my grandfather what his favorite dessert was, make it, and bam, that would be that.

(Sarcastic smile).

So I did just that.  I sent an email last week and asked Papaw what his favorite dessert was.  (Yes, my grandfather emails, and apparently he texts too.  How cool is that?)  I should have known that he wouldn't tell me something simple like banana pudding or yellow cake with fudge frosting.  Or lemon pie.  Or strawberry cake with strawberry icing.  The possibilities are endless.  I've made lots of desserts and would feel quite comfortable making lots of desserts.

But that just wouldn't do.  That would be too easy.


Papaw's favorite dessert?  Baked Alaska.  Who has ever heard of Baked Alaska?  If you have, are you younger than 50?  Just curious.  I get the impression this is an old fashioned dessert, but according to Martha, it's gaining in popularity again.  Luckily for me, there were several recipes available online, and it didn't turn out to be too complicated.  Some would argue with me (those who saw me working on it for what seemed like a while), but compared to lots of desserts I've made and others I've read about, Baked Alaska really wasn't that hard.

As it turns out, Baked Alaska is basically ice cream cake covered in meringue.  The "baked" part comes in when you brown the meringue, either with a flambe torch or in the oven.  Since the main ingredient is ice cream, I bought the best tasting vanilla ice cream available at the grocery store.  That made the main ingredient pretty easy.  I just had to make the cake and the meringue from scratch.  I decided to use Martha's recipe for the cake and this recipe for the meringue.


The hard work paid off.  My grandfather said I got an A.  =)  Everyone that had a piece seemed to really enjoy it.  Papaw even asked for seconds.  I am not sure, but I think my Papaw felt loved and celebrated, and that was certainly my goal.

If you're looking for a good dessert for a hot day this summer, give Baked Alaska a try.  You can make it with any flavor cake and any flavor ice cream (or even multiple flavors of ice cream), so the possibilities are endless.  If you try it, let me know how it turns out!

11.24.2010

A Thanksgiving Treat


I have a little cupcake blog for you, and I'm sorry it's coming 7 hours before Thanksgiving. It is probably too late for you to make these for your Thanksgiving feast, but just in case you have been sitting around, wondering about a kid-friendly dessert for your family's Thanksgiving, I have your solution. And an added bonus - it's even good for people with peanut allergies.

How do I know? Well, I volunteered to do the dessert for Elizabeth's Thanksgiving party at preschool last week...not really thinking about how hard it might be to come up with a fun dessert that is safe for kids who are allergic to peanuts and tree nuts. Just in case you're wondering, every Thanksgiving sprinkle or colored sugar is processed in a plant that also processes peanuts and tree nuts. I searched. Oh, and in case you were planning to make little turkeys to give out to the kids, like these...


Courtesy of Our Best Bites

candy corn is processed in plants with peanuts and tree nuts too. Or at least, the two brands I found were. Apparently, the Kroger brand is not, so if you want to make those super cute turkeys, go to Kroger.

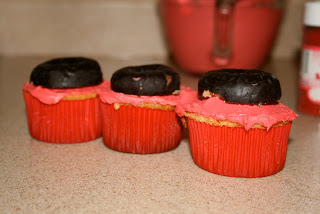
If you don't feel like going to Kroger, you can make these cute cupcakes with pilgrim hats on top. And it's pretty easy. I originally got the idea from Our Best Bites, but I adapted it for children (and grown people) who are allergic to peanuts and tree nuts.


You will need:
Yellow cake mix
Frosting (I used buttercream from a can. Gasp.)
Big marshmallows
Oreos
Baker's dipping chocolate (in the plastic/styrofoam round cup)
-depending on how many pilgrim's hats you want to make, you may need 2 or more cups
White decorating icing (I used Betty Crocker cookie icing)
Yellow decorating icing (I used Betty Crocker cupcake frosting in the aerosol type can)

Make the cupcakes according to the directions on the back of the box. After they cool, slap some frosting on them. Now, to assemble the pilgrim hats.

Line a cookie sheet with parchment paper or wax paper.

Next, heat the chocolate. Follow the directions on the Baker's chocolate cup to heat the chocolate. Follow them to the tee. If you overheat the chocolate, it will be ruined. I've heard you can add oil to the overheated chocolate, but I've never tried it and would advise that you try to avoid getting yourself into that situation.

Dip the marshmallows and Oreos in the chocolate. I'd do Oreos first, then marshmallows so that you can put the marshmallow on top of the Oreo as you go. Put them on the parchment paper after you dip them. When you've assembled as many as you would like to have, pop them in the freezer for a while, until the chocolate is good and hard.

When they are hard, use your white icing first to make a stripe around the brim of the hat. Then, use the yellow icing to make a buckle. They don't have to be perfect. Kids don't care. They just like fun treats. If they've been learning about the Thanksgiving story, they will just be excited to see pilgrim hats on their cupcakes.

Oh - and your kid may remark that they're all for boys because you only made boy hats. Simply explain that it's not easy to make girl hats on cupcakes and that even girls can eat boy hats. Enjoy!


I hope your Thanksgiving is full of friends and family and good food and that you take time to thank our Lord and Savior for all the many blessings He has poured out upon you. We have so much to be thankful for.

9.14.2010

How to Woo A Teacher


Last week was Elizabeth's sweet teacher, Mrs. Cobb's, birthday.

As the room mom, it was my role to coordinate everything for the party. I decided to enlist help from the other parents for drinks and snacks, but I wanted to do the cupcakes.

I do LOVE to bake.

I thought for a moment about what I wanted to do and remembered seeing cupcakes that looked like apples in my sister-in-law's cupcake book, "What's New, Cupcake?".


Bam. I knew what I had to do.

What would be better than apple cupcakes for a teacher's birthday?

So, I borrowed the book, and went to work.

I will admit that these cupcakes were tedious, and they honestly did not taste that great, but they sure were cute. The truth is that these cupcakes are more about presentation than taste. They were still good...just not as tasty as I like for my cupcakes to be.

With that said, if you want to woo your child's teacher, here's one way to make cupcakes that look like apples. Again, I got this from "What's New, Cupcake?", which is a fantastic book with all sorts of ideas for decorating cupcakes. If cupcake decorating is your thing, you should definitely get a copy of this book.


Ingredients for Apple Cupcakes:

Yellow cupcakes baked in red paper liners
2 Cans of Vanilla Frosting
Red Food Coloring (I used Wilton Red - No Taste from WalMart)
Red Sprinkles
Chocolate-covered mini doughnuts
Tootsie Rolls
Green Tootsie Rolls (or other green fruit chews)

First, you'll want to dye your frosting. I suggest using a few teaspoons of the gel dye for two cans of vanilla frosting, possibly more, depending on how deep of a red you want. It's a good idea to let the frosting sit overnight to let the dye achieve it's deepest red. You can see that mine wasn't super red, but it winds up getting covered with sprinkles, so it's okay if the frosting is not red red.


When you're ready to start frosting the cupcakes, spread a little frosting on each cupcake to form a base. Cut the mini doughnuts in half. Discard (or eat) the bottom halves. Place one half on each cupcake. Put cupcakes in the freezer for about 10 minutes.


Pull the cupcakes out of the freezer one by one, or two at a time. Spread the frosting on top of the doughnuts and down the sides, forming the shape of an apple as you go. Use a small spatula to spread the frosting for a nice smooth texture.

Pour the red sprinkles in a shallow dish. Roll each cupcake in the sprinkles, covering every surface of frosting.

To make the stems of the apples, I cut each Tootsie Roll in half first. Then I kind of rolled it up with my fingers until I got the shape of something that resembled a stem. You can also use a mini rolling pin to roll them out.


The leaves were my least favorite part. Seriously. I probably screamed at least once. Hopefully you'll do better than me. Use a mini rolling pin, or other firm round object, to roll the green fruit chews to a 1/8 inch thickness. Then use a knife to cut leaf shapes out of the candy. Make a line down one side of the leaf with the back of the knife and then crimp one end of the leaf to give it shape. If that doesn't make sense, refer to the pictures. My leaves were by no means perfect, but I tried.

Put one stem and one or two leaves on each cupcake. Ta-Daa!


If you're storing these overnight, put them in the fridge. I didn't, and I woke up to melted leaves. Oops.

You will put them in the fridge, though, so they will be beautiful. Put them in a cupcake taker, and take them to your kid's teacher for her birthday...or for a class party. If you're really crafty, put them in a basket like they did in the book, which is pictured at the top of this post.

Voila! You wooed the teacher.

If you try these, leave a comment, and let me know how it goes!


*A note on the supplies: I bought the red cupcakes liners, red sprinkles, Tootsie Rolls, and green fruit chews at Party City. The doughnuts were from QT. I'm sure you know where to find a cupcake mix and some vanilla frosting. As I said above, the red food coloring was from WalMart. You do not want to use liquid food coloring from the grocery store for this project. It simply will not get the frosting red enough. You need gel food coloring. I use Wilton brand, but there are others. Look in the baking supply section at WalMart, Michael's, or Hobby Lobby. Red dye tends to have a bitter taste, so either buy the no taste variety, or plan to add vanilla for extra flavoring.

9.07.2010

Chunky Apple Cake


Okay, y'all. I've got a good one for you today.

Chunky Apple Cake with Cream Cheese Icing. Need I say more?

This is a great "cake" for fall. I kind of associate apple dishes with fall. Don't you?

It's September. Even though fall doesn't officially start for a few more weeks, September just feels like fall, doesn't it? I decided this past weekend was a perfect time to make apple stuff (a nickname for my chunky apple cake that was given by my friend Patrick) to take to a friend's house for dessert.

If you like apple desserts, you should try this one.

For the cake, you will need:

1/2 cup butter, melted
2 cups sugar
2 large eggs
1 teaspoon vanilla
2 cups all purpose flour
1 teaspoon baking soda
1 teaspoon salt
2 teaspoons ground cinnamon
4 Granny Smith apples, peeled and sliced

Preheat your oven to 350 degrees. I recommend not slicing the apples until you've mixed the cake ingredients together, because apples turn brown quickly after they're sliced.

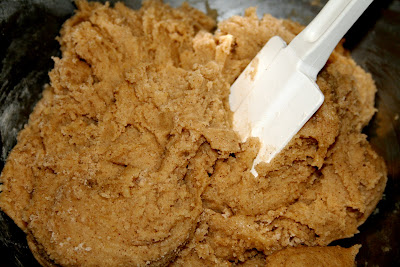
Stir together the butter, sugar, eggs, and vanilla in a large bowl, until it's well-blended. In a separate bowl, combine the flour, baking soda, salt, and cinnamon. Add the dry ingredients to the wet ones, and blend well. It will taste really good and look like this when you're done.


Now, core, peel, and slice 4 Granny Smith apples. They will look like this.


Add the apples to the tasty mixture you have in the large bowl. This is where it gets tricky, or should I say "sticky"? I have never been able to get the apple slices well-coated unless I literally stick my hands in the bowl and mix it all together. If you don't like getting your hands dirty, this recipe is not for you. On the other hand, if you like to lick yummy stuff off your fingers after you're done mixing, you will love this!

Put your hands in there (hopefully you washed them), and mix everything together until the apple slices are coated with the cinnamon mixture. This will be your cake. Pour it into a greased 13 x 9 inch baking pan, and put it in a 350 degree oven. Bake it for 45 minutes, or until a wooden pick inserted in the center comes out clean (or with just a few crumbs).


While it's baking, if you're like me, you'll wash all the dishes you had sitting in your sink before you started this process, along with the ones you just dirtied. If you're lucky, you'll have time to sit down and catch up on your email or your favorite blogs. If you happen to be looking for a good blog to read, here's one that I just found, and I am really enjoying it. Chatting at the Sky. Go on over there and see what you think. Oh, and don't be mad at me if you wind up reading for hours. =)

Okay, when the cake is finished, put it on a wire rack to cool completely. While it's cooling, mix up the cream cheese frosting. To do that, you will need:

3 tablespoons butter, softened
1 8 oz package light cream cheese, softened
1.5 cups powdered sugar
1/8 teaspoon salt
1 teaspoon vanilla extract

Begin by beating the butter and cream cheese with an electric mixer (on medium) until it's creamy. Gradually add the sugar and salt, beating until well-blended. Add the vanilla at the end, and beat for another few seconds to make sure it's mixed through.

When the cake has cooled completely, spread the frosting on top. I store this cake in the refrigerator overnight before serving it, which enhances all the flavors, but you can serve it however you'd like. I hope you enjoy it! If you do try this recipe, I'd love for you to leave a comment and let me know what you think.


Side Note: In the original recipe, which is from the September 2001 issue of Southern Living, they include 1 cup of chopped walnuts in the cake (added at the same time as the apples), and they also sprinkle walnuts on top of the frosting. I'm not a nut person, so I've always omitted the nuts, and they have never been missed.

8.20.2010

A New Favorite Recipe


This recipe has quickly become one of my favorites. It cooks in the crock pot, which I love. It smells delicious as it cooks, which makes me happy all day. And best of all - it tastes even better than it smells! It's definitely a southern dish. Those are the best, if you ask me. It's soul food. Comfort food. Stick-to-your-ribs food.

Slow Cooker Pork Chops and Field Peas
Southern Living, February 2010
Click HERE to see the recipe on the Southern Living Site

Ingredients:
1 (16 oz) package frozen field peas and snaps, thawed
1 1/2 tsp dry mustard
1 tsp salt
1/2 tsp garlic powder
6 (1 inch thick) pork chops (or however many your family eats)
1/2 cup all purpose flour
2 Tbsp vegetable oil
1 large sweet onion, sliced
1 (10 1/2 oz) can condensed chicken broth

Directions:
1. Lightly grease your slow cooker, or spray it with PAM.
2. Put (thawed) peas in slow cooker.
3. Sprinkle both sides of pork chops with mixture of mustard, salt, and garlic powder.
4. Dredge pork in flour.
5. Heat oil in large skillet over medium-high heat. Cook pork, in batches, in hot oil 3-4 minutes on each side, or just until browned. Transfer pork to slow cooker. Reserve drippings in skillet.


6. Saute onion in hot drippings over medium-high heat 6 to 7 minutes, or until tender. Add chicken broth, and cook 2 minutes, stirring to loosen particles from bottom of skillet.


7. Spoon onion mixture over pork in slow cooker.
8. Cover and cook on LOW 6 hours.

** One thing I've discovered is that you really do not need to leave it it in the crockpot for more than 6 hours. I tend to put things in the crockpot at 9am, thinking it doesn't matter if they cook longer than it says in the recipe. Sometimes they cook til 6 or 6:30, which doesn't usually matter, but in this case, it does. Stick to the 6 hour cooking time. Otherwise, the pork gets too done, and the peas are a little over-cooked as well.

This meal is excellent. I like to serve it with rice and Dave's Cornbread, which is the best cornbread I've ever tasted. Maybe I'll share that recipe with you in the future. I have to check with my source to make sure I'm allowed. (wink)

Now, go get you some pork chops and throw 'em in the crockpot. And don't skip the frying part. It adds so much to the flavor. Trust me.

2.12.2010

Valentine's Day Projects

You know, I never really cared for Valentine's Day. It has always seemed kind of overrated to me...another one of those holidays where there's so much pressure to do something (be romantic, in this case) that really never turns out to be quite what I'd hoped.

But...now that I have kids, I love it. It's a great holiday for doing fun projects with the girls. Well, with Elizabeth. Layla's not really into crafts or baking yet, so she just runs around (screaming, most of the time, because I'm not giving her my undivided attention) while Elizabeth and I make things. And we made a lot of things this week.

Here is a run-down of our week of Valentine's activities:

Elizabeth loved helping me make valentines for the kids in her class. Originally, I planned to give them some I bought at the store, but something handmade is always better.

The finished Valentines for her classmates.

And some for her teachers.

When we were finished making valentines, we moved on to cupcakes. I had signed up to bring cupcakes for the party, and I had all these great ideas for decorating them. Well, as it turned out, Elizabeth had her ideas, and rather than fight her, I just decided to let her do it. I'm such a perfectionist and can tend to be a bit of a control freak (I know that's shocking to most of you, but it's true) that it was hard for me to relinquish control of the decorating, but you know what? She had so much fun. And they were for her 2 year old classmates, who could not have cared less about the lovely nonpareils that I would have used or the designs I would have drawn with red cookie icing (Betty Crocker squeezable tube from Publix - one of the best things I've discovered for decorating all sorts of treats).

So we had sugar sprinkles...lots of sugar sprinkles.

We really didn't have to make anything else, but my good friend Lanie Beth gave me the cutest red heart cookie cutter, and I just couldn't let it go to waste. So...

Elizabeth helped me make sugar cookies too.

I told y'all we were busy. She loves helping with sugar cookies. Again - very hard for me to let go of the control, but I'm learning it's well worth it. Even if it means I have to keep rolling the dough, because only half of hers turn out each time.

I used a basic sugar cookie recipe I found in a Southern Living cookie book that I've had forever and have never used. I really didn't care for the cookies. This is the third recipe I've tried for sugar cookies, and I have yet to find one I like. I am definitely on the hunt for a no fail sugar cookie recipe...one that is TASTY and moist but still works well with cut-outs. If you have one, please post it as a comment.

This time, to cover up the yucky taste of the cookies I made,
I dipped a lot of them in glaze. The recipe is super simple.

Sugar Cookie Glaze
1 (1 lb.) box of confectioners sugar
6 Tablespoons of water
Food coloring paste
*Stir/whisk ingredients together, and voila!

I bought a bottle of rose colored Wilton food coloring paste from WalMart. It's $1.50 a bottle and will last forever. I have to say it turned out much darker pink than I had hoped, but it grew on me. We had fuschia Valentine's cookies, but truthfully, it was a change from the usual red and pale pink. I sprinkled the cookies with nonpareils. I love those things.


In doing all of our projects, we had lots of messes.

When you work with food coloring paste, it inevitably gets on the counter.

And that stuff is a beast to get off, unless you have some of this,
another one of my favorite products.

Honestly, it was a busy week, and I'm still exhausted, but I had so much fun. I can't wait to start a new project with Elizabeth. I have a feeling it won't be long. She enjoys it so much that I bet she will want to do something again very soon.

Oh - my favorite pictures. Our finished desserts. Check out the cloche (pronounced closhe) on my favorite cake stand below. I got two cloches from my sister-in-law for Christmas, and I just love them. Like, really love them. There's just something about a cloche that makes anything you put under it special. Like our cupcakes.


In addition to the cupcakes and glazed cookies, I made two types of cookie sandwiches. Both were very tasty. For the light pink ones, I used a smaller heart cookie cutter to cut hearts out of several of the cookies. Then I spread buttercream icing on one large heart cookie and put one with a cutout on top. For the fuschia sandwiches, I put vanilla frosting between two small heart cookies and rolled the edges in nonpareils. Yum.

Happy Valentine's Day!

8.21.2009

CRAVE

So it's been a week, and each day I've been wanting to sit down and do a recap of Crave, but it just hasn't happened. It's been a busy week. They all are. As I type, Layla is playing behind me (slowly crawling my way, I might add) and Elizabeth is talking in her bed, but I just have to get this post finished. I want to let y'all know how awesome it was!

And it was. Awesome. Truly awesome, in the Biblical sense. It was worthy of awe. Well, I shouldn't say "it". God was worthy. He showed up, and He was awesome. How did He show up? Let me tell you.

1. He came to the house on Friday and helped me decorate the cupcakes. There's no way I would have finished it all without Him (and Ms. Emma). Not a chance.
2. He came to Momentum, in the form of Jodi and Mandy, who unexpectedly helped our hospitality team pull it all together, just in the nick of time.
3. He multiplied the cupcakes, because there's no way we had enough for all those women.
4. He brought all those women!! (135)
5. He sang and played the instruments for the women on stage. They rocked it.
6. He spoke through Melissa as she hosted, making everyone feel so welcome.
7. He sent his message through Lanie Beth, and it was a powerful message, full of His Word, and full of encouragement to become women who know and love Him and are worthy of being called His daughters and His friends.

And those are just a few of the ways He showed Himself to me. I know He showed Himself to so many others along the way. It was a great night, and I'm looking forward to the next one for sure. I'm not quite sure what we'll do for dessert, because I'm afraid it will be hard to top the gourmet cupcakes, but I know He'll show me something that will make the women feel special. That's the goal, right? To create an environment where every woman who comes through the door feels welcomed, treated, special, and loved, which will hopefully open their hearts so they can truly experience God and see that He is it. He is what we Crave.

I've posted pictures below. By the way, I have to say thanks to Marcia Greer for making the Banana Pecan and Chocolate Chip cupcakes and to Cindy Schade for making the Yellow Buttermilk cupcakes with teal icing. They did a lovely job. I also want to thank the girls that helped with setup, serving, and cleanup: Marcia, Je-Nita, Mandy, Jodi, Debbie and others. They were a great team! Oh - and a final note. What do you think about the name Crave for the bakery I'm going to open one day? It has a nice ring to it, doesn't it? I wonder if that would be a copyright infringement.


Last, but not least, I have to show a picture of Elizabeth. She helped me make and decorate the coconut cupcakes. She was awesome! A little baker in the making.

8.14.2009

Norma Faye

So, I'm in the middle of making 120 cupcakes for Crave, a women's event tonight at Momentum (my wonderful church). As I leave for the 50th trip to the store, I am reminded of my beloved grandmother, Norma Faye Brogan Johnston, or Memaw (pronounced Mim-aw) to me. Memaw went to the store at least once per day. She often went to the grocery store (Sunflower) and then still had to send someone to the curb store (aka gas station) to get something else. She must be smiling over me today, because I've already been to the store twice in the last 14 hours, and I'm leaving again, because I need more sugar. Please God let this be the last trip. I'd also like to think she's proud of me, because she was the most hospitable person I knew, and lately I feel like the Spirit is changing me to be more like her. I serve on the hospitality team at church, and I love it. Making coffee and doughnuts is what I physically do, but serving is the true job, and I love it. I love making people feel at home. I love having people over, cooking for them, and hopefully making them feel at home. So...Memaw...here's to you! I hope one day I can be as loving, kind, and hospitable as you were.